Acoustic‑Foam Tire Repair (Field Guide)
Prepared for field use by Sparky X Mobile Tire Shop
TIA‑certified | OTDA member | Tesla‑operated fleet | Fully insured
Last updated: Sept 19, 2025
Purpose
Quick, technician‑ready guidance for repairing passenger/light‑truck tires equipped with sound‑suppression foam (e.g., ContiSilent, B‑Silent, SoundComfort, PNCS, Noise Shield). Use alongside USTMA puncture‑repair standards.
Repair Eligibility (Regardless of Foam)
Only punctures in the crown/tread area within USTMA size limits (≤ 6 mm / 1⁄4 in) are repairable.
Not repairable: sidewall or shoulder injuries; run‑flat driven at zero pressure beyond manufacturer limits; visible/bulging cords, separations, liner cracks, or bead damage.
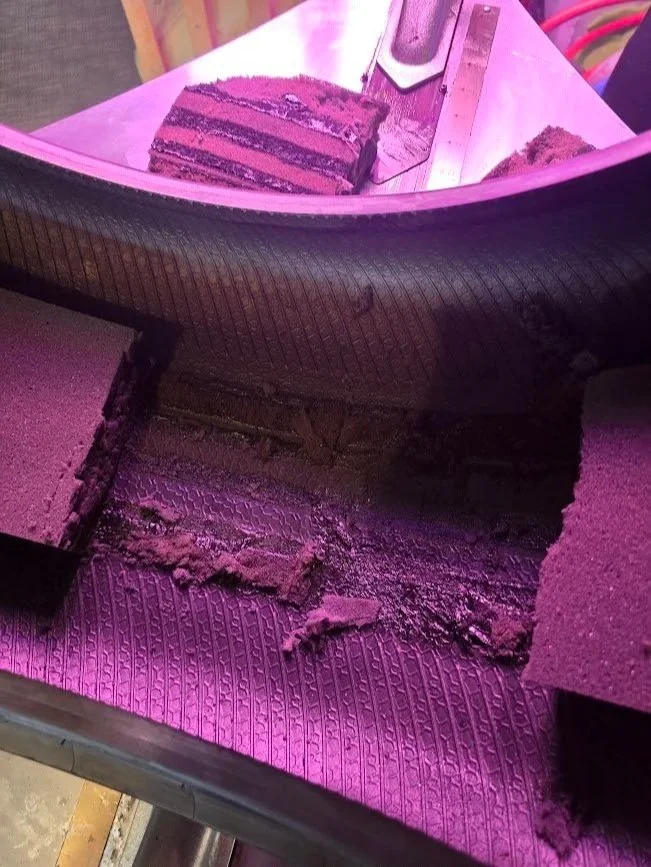
Sound suppression foam removed inside an EV tire.
| Brand / Source | Instruction on Foam | Notes |
|---|---|---|
| Bridgestone (B-Silent) | Do not reinstall removed foam. Discard or recycle. | Bulletin P-23-02; cut only what’s needed to access/repair. |
| USTMA (Industry Standard) | Do not reinstall. Discard the removed foam piece. | TISB Vol. 52 No. 1 (Passenger & LT). |
| GM (select OE with ContiSilent) | Reinstall removed foam using tire cement after repair. | Applies to select GM OE fitments (e.g., certain Buick models). |
| Kia (EV6, PS727) | Reinstall removed foam; adhere with tire cement; allow to dry. | EV6-specific service bulletin. |
| Continental (ContiSilent) | Follow approved ContiSilent repair method; if not specified, default to USTMA. | Some OE programs may require reinstall; verify. |
| Goodyear (SoundComfort) / Dunlop (Noise Shield) | Refer to SoundComfort/Noise Shield repair PSB (dealer portal). | If no explicit direction, default to USTMA. |
| Pirelli (PNCS) | Avoid modifying PNCS foam outside approved procedures. | If no explicit direction, default to USTMA. |
| Hankook (Sound Absorber / iON EV) | Contact technical support for guidance. | If no explicit direction, default to USTMA. |
Standard Procedure — Foam‑Equipped Tire (Field Steps)
1) Identify & Inspect
Confirm foam‑equipped tire (markings/labels), record brand/line, size, DOT, load/speed. External assess injury; remove all air before demounting.
2) Demount & Access
Break beads; lift foam carefully. Cut a straight window ~10 cm / 4 in only where needed. Keep the removed piece clean if policy requires reinstall.
3) Injury Preparation
Probe to confirm angle/size; mechanically clean/ream to proper diameter; buff the inner liner to texture per patch spec; vacuum dust.
4) Repair Unit Install
Apply vulcanizing cement to channel and buffed liner. Install a combination repair unit (plug‑patch) from the inside. Stitch from center out; pull stem; trim flush on tread side.
5) Inner Liner Sealer
Apply suitable inner‑liner sealant over the buffed/stitched area.
6) Foam Handling
• Reinstall policy: Apply inner‑liner sealant to the foam pad; press to re‑bond; allow adequate dry time.
• Discard policy: Remove loose remnants; ensure even surface and no debris above repair.
7) Reassembly & Inflation
Replace valve (snap‑in/HP metal as required). Use approved bead lube. Inflate in a restraint/safety device. Never exceed 40 PSI (275 kPa) for bead seating. If beads do not seat by 40 PSI, deflate, diagnose, and correct before retrying.
Set Pressure, Balance, TPMS
Set to vehicle placard pressure; dynamic balance; perform TPMS relearn/program as needed.
Final Checks
Soap test; verify no rubbing of foam against repair; document and apply torque to manufacturer spec if wheel is reinstalled.
Documentation Checklist (Attach to RO)
Tire brand/line, size, DOT, load/speed index; foam technology present.
Injury location/size; USTMA eligibility confirmed.
Repair method: combination repair unit; inner liner sealer used.
Foam policy applied: Reinstalled with cement or Discarded per USTMA.
Valve service performed; wheel torque; retorque notice provided.
Notes on runflat status, if applicable.
Customer Messaging (Plain Language)
“Your tire has factory acoustic foam. We followed manufacturer/industry rules to perform a permanent plug‑patch from the inside. Depending on brand/OE guidance, we re‑installed the foam with tire cement or safely removed the cut piece per USTMA. This preserves performance and safety.”
“Repairs are limited to small punctures in the tread area; sidewall or large injuries require replacement.”
“We torque wheels to spec and recommend a retorque after 50–100 km.”
Materials & Tools
Combination repair units (plug‑patch) in appropriate sizes; vulcanizing cement; inner‑liner sealer.
Buffing tools, carbide reamers, vacuum, stitch rollers.
Bead lubricant (non‑petroleum); new valves/cores as required.
Inflation safety device; calibrated pressure gauges.
TPMS tool; dynamic balancer.
Safety Notes
Never use flammable agents to seat beads.
Do not exceed 40 PSI for bead seating. If seating fails, stop and diagnose cause (lubrication, rim/tire mismatch, rim damage, etc.).
Runflat procedures require certified process and equipment; verify before proceeding.
References (for shop use)
USTMA Puncture Repair Standard (Passenger & LT): Acoustic‑foam note.
GM OE bulletin (select ContiSilent applications): foam reattachment.
Continental ContiSilent: approved repair procedure requirement (page 14).
Goodyear SoundComfort / Dunlop Noise Shield: repair PSB (dealer portal).
Hankook Sound Absorber / iON EV: technical support guidance.
Sparky X Mobile Tire Shop
GTA | Durham | York
647‑819‑0490